The Inventory feature will come preloaded with any parts you already have added in your AlarmBiller software. The parts table shows a complete list of the parts in all warehouses. For example, the quantity column reflects the total number of parts across all warehouses.
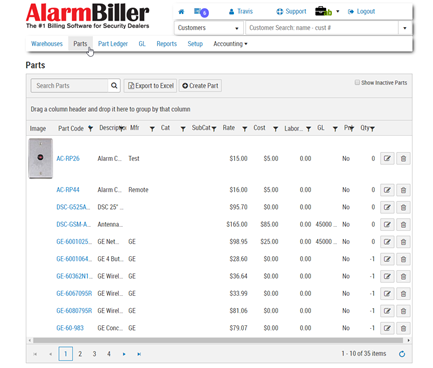
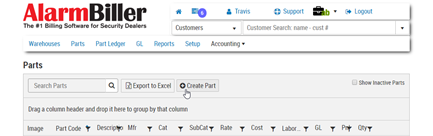
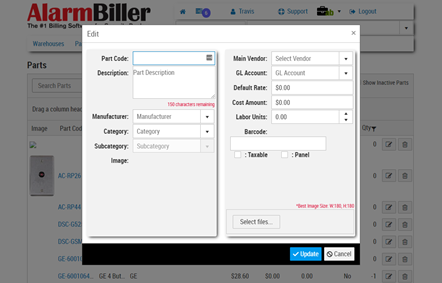
From this view, you can add, edit, or delete parts from this table. When adding a new part, you will be prompted to provide the following details:
- Part Code: Assign the part a unique code.
- Description: Give the part a brief description.
- Manufacturer: Select the manufacturer from the dropdown list.
- Category: Select the category from the dropdown list.
- Subcategory: Select the subcategory from the dropdown list.
- Image: Upload an image of the part.
- Main Vendor: Select the primary vendor for the part.
- GL Account: Select the GL account associated with the part.
- Default Rate: Set the default rate the part will be sold for.
- Cost Amount: Enter the price paid for the part.
- Labor Units: Set the labor units associated with the part.
- Barcode: Enter the barcode number for the part.
- Taxable: Identify if the part can be taxed.
- Panel: Identify if the part is a panel.
Parts Detail
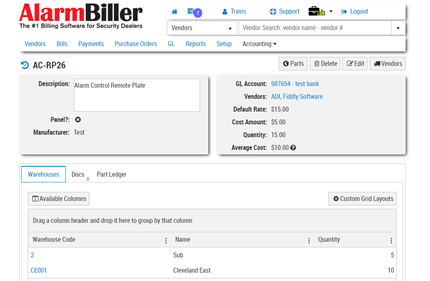
View more details about each part by clicking code from the parts list. This view shows to including which warehouse(s) it can be found in, related documents, and the part ledger pertaining to that part. You can also view part details such as the rate, cost, and quantity and average cost of the part across all warehouses.

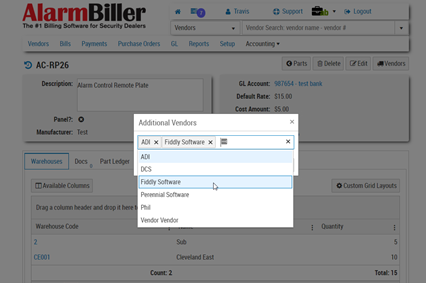
Each part can be associated with multiple vendors. When viewing part details, you will notice that if there are multiple vendors listed. If there is a primary vendor, the name will be in bold. Also, the average cost listed is takes into account the average cost for that part across all warehouses.
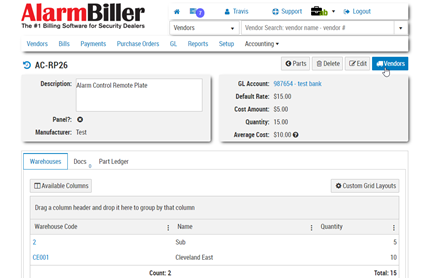
The part ledger in the part details view shows all the ledger transactions affecting that part. These details include where parts came from (shown as a negative value) and where parts are going (shown as a positive value) if that part was transferred.
Part Adjustments
Manually adjust the rate and/or quantity of a part for a particular warehouse using the Part Adjustments feature. Adjust the rate and/or quantity and add a note explaining the change(s) made. Note: the two numbers in the brackets under the quantity show the minimum and maximum desired amount (red quantity means it falls outside that range).
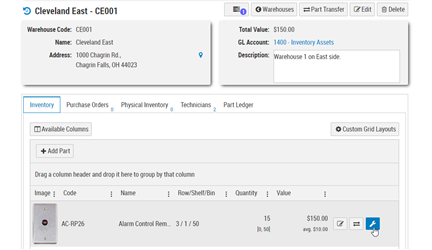

Move parts from one warehouse to another using the Part transfer feature. This can be done for an individual part (part transfer button on the part line) or for multiple parts in a single warehouse (part transfer button at the top of the page).
![]()
![]()
In the Part Transfer window, you can choose the originating warehouse, transfer destination, and which part(s) to send. You also have the option to send one (send piece by piece), send many (window pops up asking how many, fill out how many to send – entering more than max qty will default to the max qty), send all (bring to max), and undo action if a mistake is made.
![]()
Clicking the “Transfer” button will take you to a summary window to review the transfer details and save. Next, you will see the part ledger entry for the transfer you just made (details how the part was changed). Here, you have an opportunity to document the reason for the part transfer (e.g. replenish a warehouse).
![]()
![]()
Finally, you can view the part transfer order (print preview) and print or deliver the form via email. This form can be used to give the warehouse notice to initiate the transfer.
![]()
![]()